To make it easier to explain the complete process we assume you have stored all your media in a folder "Media".
- Download the "AMT Accelerator" application: Go To Demo Page.
- We now have to create a special version of the Runtime Maker to build accelerated titles.
- Download the special "CODES" folder for Runtime Maker from our Demo web-page: Go To Demo Page.
- Create a new folder and name it "Accelerated Runtime Maker".
- Put in this folder the "CODES" you just downloaded.
- Put in the "Accelerated Runtime Maker" folder a copy of the "Runtime Maker" application.
- You now have a special "Runtime Maker" that can build Accelerated titles.
How accelerate a title:
- Open your AMT project in Apple Media Tool and do "Save as Text...".
- Before we start, create a new folder next to your "Media" folder and name it "Media in Database"
- Open the file <title>.k in the "AMT Accelerator" application, this is the same file you have to open in the "Runtime Maker" application.
- The AMT Accelerator Tool will now make some changes to the files stored in the "SOURCES" folder and the file <title>.k.
- During these changes it will also analyze your project for the media (Pictures, Text,...) your are using.
- After this step is done it will present you a window with the complete list of media found in your project.
- Now you have to create the media database, choose the "Create MediaDB..." item in the File menu.
- Place this media database (MediaDB) in your "Media" folder.
- After the creation of the MediaDB is done, the application will ask you to move your media to another folder, please select the folder "Media in Database".
- After this is done, Quit the "AMT Accelerator" application.
- Now take the special "Runtime Maker" and build your title.
You now have an accelerated title. This title can also run with the normal "Media" folder just rename the folder "Media in Database" into "Media" and run your title again. In the case you use ambient sounds and panoramic QTVR movies please read the full description here below.
Double click on the "AMT Accelerator 2.5" application you just installed from the floppy disk.
The AMT Accelerator application works in 2 steps to accelerate your title. In the first step it will analyses your project source code and will add some extra Apple Media Language code. During this analyzing process the application will generate a list of media used on every AMT screen. In the second step it uses this media list to generate the actual media database.
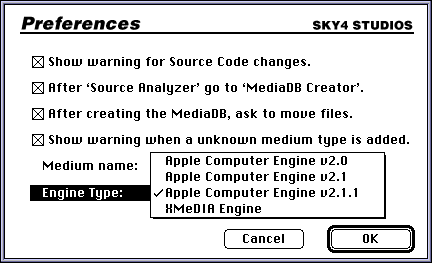
If you use the XMeDIA Engine from the Carl Group, Inc. then you have to choose the "Preferences..." item from the "File" menu and select as Engine Type "XMeDIA Engine". Remember we support only version 2.1 of the XMeDIA engine, which is currently in development. In the case you use Apple Media Tool version 2.0 you also have to change the Engine Type.
If you have a project where the same file name is used more then once, then you have to choose not unique for Medium name in the Preferences dialog. (This kind of technique you see often in titles for different languages for example you have a folder ENGLISH and FRENCH both containing media with the same file name. When the user chooses FRENCH you just switch from medium folder.) If you need more information on this matter please go to appendix IV of the documentation.

Let's accelerate:
1. To start the acceleration you choose "Open" from the File menu and select your <title>.k file, this is the same file you have to choose when you run the "Runtime Maker" application.
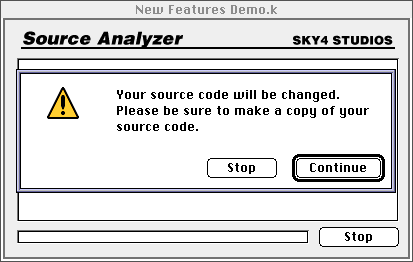
2. You will receive a warning that your source code will be changed. (In the Preferences dialog you can disable this warning message.) Just press the "Continue" button to start the source code changes.

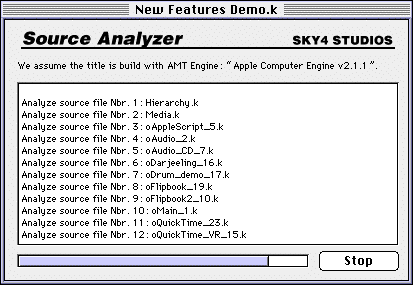
3. The source Analyzer dialog appears on screen and will inform you what he is doing. The complete process is in detail explained in Documentation chapter 4: "The Source Analyzer". If you are an AMTPE user please read this chapter it contains some useful information.

4. The source analyzer will now create a file called <title>.m, where <title> depends on the name of your project. If it is the second time you run the Source Analyzer on your project the file will be called <title> 001.m and so on...5. This file will now be used for the next step, the actual creation of the media database or like we call it: the MediaDB. You have noticed that we went automatically from the Source Analyzer to the MediaDB Creator, in the Preferences dialog you can disable this option.

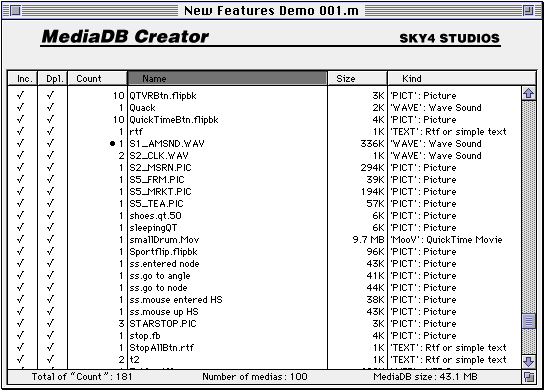
6. The MediaDB Creator window is explained in detail in chapter 5: "The MediaDB Creator". But to give you a quick guide: Above the media list you have a title bar. "Inc" stands for included media, "Dpl." stands for media that is allowed to be duplicated in the MediaDB. The "Count" specifies on how many screens this media is used. When you click on one of those titles your media list will be displayed accordance to this criteria. When you click on the mark symbol ( ) in the "Inc." and "Dpl." column, the symbol will disappear and disable "include" or "duplicate" for the medium. These values can also be controlled by the filters in the "Filter" menu.It is possible to add extra media with "Add Files" and "Add Folder" items in the File menu.
Warning:
- When you use interlude sounds or interlude pictures or ambient sounds, you have to know that these media are not added automatically so you have to add them with "Add Files" or "Add Folder" operations in the File menu.
- Also when you use switch media techniques you have to add the files yourself to the media list.
- You can't add QuickTime VR Panoramic Movies to the MediaDB, be sure to uncheck the include option for these media. They have to be stored in the media folder just as with a normal AMT title.
- When you build a cross-platform title and you are using ambient sounds, then these ambient sounds have to be stored in the media folder just as with normal AMT title. When your are building a Macintosh only title then you are allowed to import the ambient sounds into the media database. Regular sounds can be included!
- One Tip, give your ambient sounds and QTVR movies a recognizable name so you can use a name filer to remove them from the media list. (see chapter 5.)
7. When you choose the "Create MediaDB..." item in the File menu, you create the MediaDB database. AMT Accelerator will create 3 files: "MediaDB.DBB", "MediaDB.IN1" and "MediaDB.IN2". The "MediaDB.DBB" contains the actual media, "MediaDB.IN1" contains the search data for the MacOS platform and "MediaDB.IN2" contains the search data for the Windows platform.
Where do I place the MediaDB file?
If you have a simple AMT project where all the media is placed in one folder, it is very easy you place the MediaDB files in your media folder. In the case you have more then one media folder the problem is a little bit more complicated. To explain this take a look at the example here below:
Here above, you have a project with 2 media folders. Now when the AMT Accelerator tool will analyze your project it needs to know where it can place the MediaDB files. The strategy that is taken is that the MediaDB files are placed in the first folder where it can find media. So in the example here above it will be in the folder "MOVIES".
It is possible to change this position: If you look at the bottom of the file "Hierarchy.k", which you can find in your "SOURCES" folder, you will obtain the following code.
RelativeFolder is cDefaultFolderwith Name is ""; Items is [ cDefaultFolder with Name is "MEDIA"; Items is [ cDefaultFolder with Name is "MOVIES"; Items is [ GMEDIADB, -- <<>> MediaDB Extra V2.1 oBIG_DRUM_VR, oSMALLDRUM_MOV ]; end, cDefaultFolder with Name is "SOUND"; Items is [ MOONRISE_SND, QUACK, S2_CLK_WAV ]; end, ]; end ]; end;
If you want MediaDB to be placed in the MEDIA folder you can change the "Hierarchy.k" file in this way:
Name is "MEDIA";
  Items is [
     GMEDIADB, -- <<>> MediaDB Extra V2.1
     cDefaultFolder
      with
        Name is "MOVIES";
        Items is [
            oBIG_DRUM_VR,
            oSMALLDRUM_MOV
        ];
     end,
8. If you are an AMT user you now have to run the special "RunTime Maker" and your title is accelerated. With special we mean that you have to use one of the two CODES folder we delivered on the floppy. Now when you run the "RunTime maker" be sure to place near to the Runtime Maker application the new CODES folder.
9. For AMTPE users I would advise you to read the Documentation at chapter 6: "The AMTPE user". In general you have to take the "program.make" file that is offered on the AMT Accelerator floppy, add some files to your project folder and recompile your project. For the Windows version you have to da exactly the same kind of job.